DITO SIM Activation Guide
Activating a new DITO SIM is a quick process, but it involves more than simply inserting the SIM card into your phone. To enjoy calls, texts, and mobile data, you’ll also need to complete the mandatory SIM registration required by Philippine law.
Whether you’re using a physical DITO SIM or a DITO eSIM, this guide walks you through every step—from installation and APN configuration to identity verification and troubleshooting. By the end, you’ll know exactly how to activate your DITO SIM and start using its services without unnecessary delays.
Related – DITO Data Promos & activate your DITO eSIM
Quick Answer: How Do You Activate a DITO SIM?
To activate a DITO SIM:
- Insert your physical DITO SIM or install your DITO eSIM.
- Turn on your phone and enable mobile data or Wi-Fi.
- Open the official DITO SIM Registration Portal using the registration link sent via SMS or by visiting the official website.
- Enter your personal information.
- Upload a valid government-issued ID and complete the selfie verification.
- Submit your registration.
- Wait for the confirmation message indicating your SIM has been successfully activated.
Once your registration is approved, you can immediately use DITO’s mobile services.
Why SIM Registration Is Required
Under the SIM Registration Act in the Philippines, all prepaid and postpaid SIM cards must be registered before full network services become available.
The registration process helps:
- Verify subscriber identity
- Reduce spam and scam activities
- Improve account security
- Enable uninterrupted mobile services
Failure to complete registration may result in service restrictions or SIM deactivation.
Before You Activate Your DITO SIM
Prepare the following before starting:
- Your new DITO SIM or eSIM QR code
- A compatible smartphone
- Stable internet connection (Wi-Fi or mobile data)
- A valid government-issued ID
- Good lighting for selfie verification
Having everything ready makes the activation process much faster.
Complete Registration guide on : Tnt Sim Registration
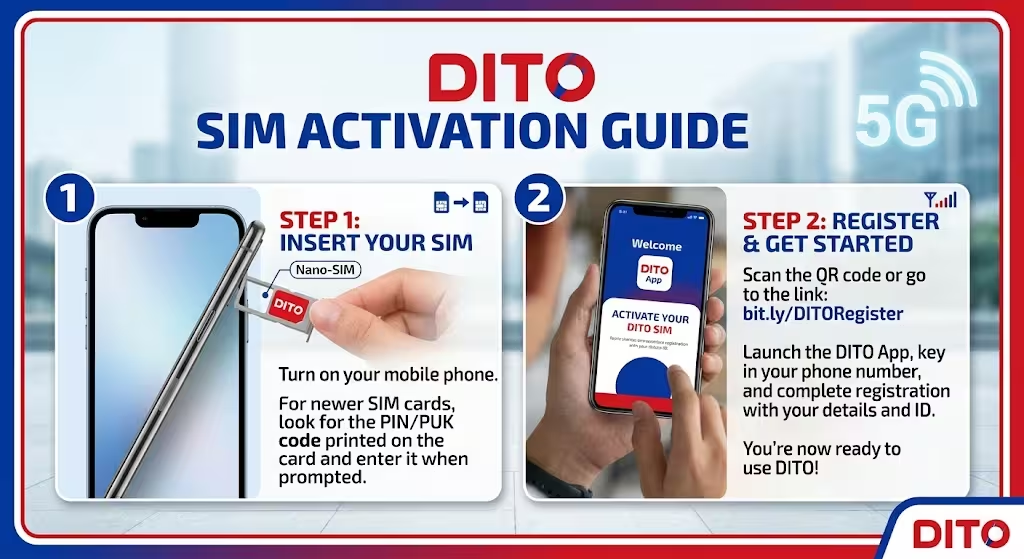
How to Activate a Physical DITO SIM
Step 1: Insert the SIM Card
Insert the DITO SIM into your phone’s primary SIM slot.
Power on your device and wait for it to detect the network.
Step 2: Enable Mobile Data
Turn on Mobile Data.
If your phone doesn’t automatically connect to the internet, you may need to configure the APN manually.
Use these settings:
| Setting | Value |
|---|---|
| Name | DITO |
| APN | internet.dito.ph |
| MCC | 515 |
| MNC | 66 |
| APN Type | default,supl,xcap |
Leave the remaining fields blank unless instructed otherwise.
Step 3: Save the APN
Save the new APN profile and select it as the active connection.
Restart your phone if mobile data doesn’t work immediately.
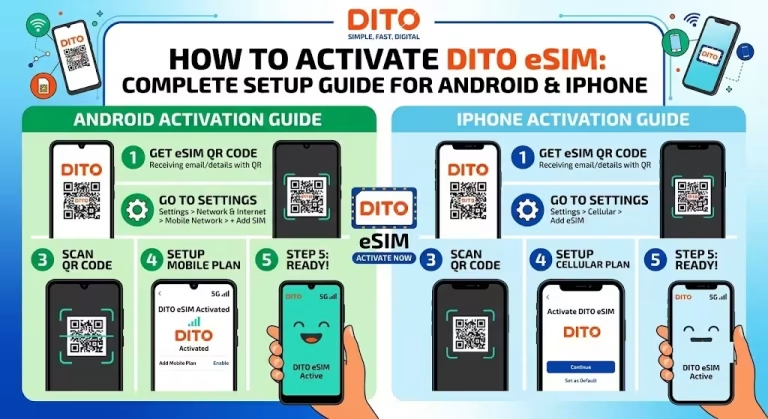
How to Activate a DITO eSIM
If you purchased a DITO eSIM, installation is completed digitally.
On Android
- Open Settings.
- Tap Connections or Network & Internet.
- Select SIM Manager.
- Tap Add eSIM.
- Scan the QR code sent by DITO.
- Wait for the profile to download.
- Restart your phone.
On iPhone
- Open Settings.
- Tap Cellular or Mobile Data.
- Select Add Cellular Plan.
- Scan the DITO QR code.
- Complete installation.
- Restart your device.
Once installed, continue with SIM registration.
How to Register Your DITO SIM
Registration only takes a few minutes.
Step 1: Access the Registration Portal
After inserting the SIM, you’ll typically receive a welcome SMS containing your exclusive registration link.
You can also visit the official DITO SIM Registration Portal if needed.
Step 2: Enter Your Information
Provide your:
- Full name
- Birthdate
- Residential address
- Gender
- Other required subscriber details
Review everything carefully before continuing.
Step 3: Upload a Valid ID
Upload a clear image of an accepted government-issued ID.
Ensure all information is readable.
Step 4: Complete Selfie Verification
Follow the on-screen instructions to take a live selfie.
This confirms your identity and helps prevent fraudulent registrations.
Step 5: Submit Your Registration
After reviewing your details, submit the application.
You’ll receive confirmation once your registration has been processed successfully.
What Happens After Activation?
Once approved, you’ll receive a confirmation message indicating your SIM is active.
Next, you should:
- Install the official DITO App.
- Log in using your mobile number.
- Monitor your balance and data usage.
- Purchase promos or load packages.
- Manage your account settings.
Troubleshooting DITO SIM Activation
If activation doesn’t complete successfully, try the following solutions.
Restart Your Device
Many activation issues are resolved after restarting the phone.
Verify APN Settings
Incorrect APN settings can prevent mobile data from working properly.
Double-check that the APN is:
internet.dito.ph
Check Network Coverage
Ensure you’re in an area with DITO network coverage.
Weak signal strength may delay activation.
Confirm SIM Registration
If registration wasn’t completed successfully, network services may remain unavailable.
Log back into the registration portal to verify your submission.
Update Your Device
Installing the latest software updates can improve network compatibility.
Common Activation Mistakes
Avoid these common issues:
- Skipping SIM registration
- Uploading blurry ID photos
- Using incorrect personal information
- Forgetting to save APN settings
- Scanning an expired eSIM QR code
- Ignoring confirmation messages
Taking a few extra moments to verify each step can prevent delays.
Tips for a Smooth Activation
To activate your DITO SIM as quickly as possible:
- Register immediately after inserting the SIM.
- Use a strong internet connection.
- Take clear photos of your ID.
- Complete the selfie verification in a well-lit area.
- Keep your confirmation message for future reference.
Frequently Asked Questions
How long does DITO SIM activation take?
Most activations are completed shortly after successful SIM registration, although processing times may vary.
Is SIM registration mandatory?
Yes. Registration is required before you can fully use DITO mobile services.
Can I activate a DITO SIM without the app?
Yes. Registration can be completed through the official DITO SIM Registration Portal.
Why isn’t my DITO SIM working after registration?
Check that:
- Your registration was successful.
- Your APN settings are correct.
- Mobile data is enabled.
- You’re within DITO coverage.
Restarting your device may also help.
Can I activate a DITO eSIM the same way?
Yes. Install the eSIM profile first, then complete the same registration process required for physical SIMs.
What ID can I use?
DITO accepts various valid government-issued IDs. Refer to the official registration portal for the latest list of accepted identification documents.
Final Thoughts
Activating a DITO SIM is straightforward when you follow the correct sequence: install the SIM, configure the APN if necessary, complete the mandatory registration, and verify your identity. Whether you’re using a physical SIM or an eSIM, the entire process can typically be completed in just a few minutes.
If you experience activation issues, verify your APN settings, ensure your registration is complete, and consult DITO’s official support resources for the latest guidance.